GDPR & Cookie Consent
Integrate Pixel Plus with your store's cookie consent banner so the Facebook pixel only fires after a visitor has explicitly agreed to tracking.
Available since v2.3
Overview
If your store operates under GDPR or similar privacy regulations, you need to hold the Facebook pixel back until a visitor actively accepts cookies. Pixel Plus has a built-in consent integration that handles this without relying on a third-party blocker to strip script tags from your pages.
The integration works by telling Pixel Plus exactly how your consent banner signals acceptance. On every page load, the module checks for that signal — either a cookie (the most common approach) or a localStorage variable (used by some modern consent platforms). If the signal is present and valid, pixel events fire normally. If not, all browser events are paused.
Internal vs external cookies
Cookie consent modules typically store the visitor's choice in one of two places:
- Internal cookie — the consent flag is written inside the PrestaShop cookie object. PrestaShop encrypts this cookie in the browser, so its contents are not directly readable in DevTools. Pixel Plus can still read it server-side (PrestaShop decrypts the cookie automatically), and the panel includes a tool to display its contents in a readable format (see Cookie inspector tool).
- External cookie — the consent flag is written as a separate, standalone cookie by the consent module or a third-party banner. It is plainly visible in DevTools > Application > Cookies. Most third-party consent platforms (Axeptio, Didomi, Cookiebot, etc.) use external cookies.
The Is an External Cookie? switch tells Pixel Plus which of the two it should look in.
The key advantage over external blockers is reliability. Modules that block Pixel Plus by removing script tags can accidentally strip JavaScript needed for other features, break the Back Office panel, and prevent the Conversion API from functioning even for staff. The built-in integration leaves all module code in place and simply pauses the event queue in the visitor's browser.
This panel controls both channels. The browser pixel and the server-side Conversion API read the same consent state, so when consent has not been granted neither one sends anything to Facebook. What matters is that Pixel Plus can see the consent signal itself — see Consent applies to the Conversion API too.
Configuration
Cookie-based consent (most common)
- Go to Modules > Module Manager > Pixel Plus for Facebook > Configure.
- Locate the GDPR & Cookies Consent panel.
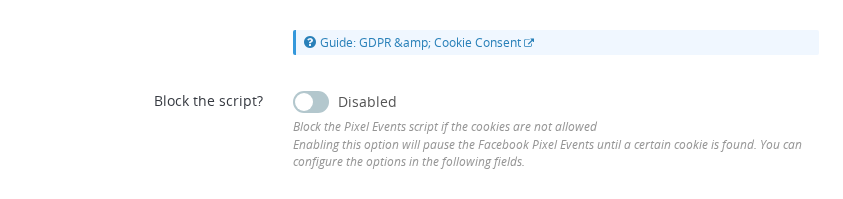
- Enable Block the script?.
- Set GDPR Block Mode to Cookies.
- Open your storefront in a private/incognito window and accept cookies. Open browser DevTools (F12) > Application > Cookies and find the cookie your consent banner sets.
- Enter its exact name in Add the cookie name to look for (names are case-sensitive — copy-paste from DevTools).
- Enter the value that signals marketing acceptance in Specific Cookie Value?. This field is the key to the whole configuration. In most cases the consent cookie holds a JSON object with one entry per cookie category — copy the fragment that says marketing was accepted, for example
"marketing":"true". Pixel Plus will then check whether that exact fragment appears anywhere inside the cookie value. Leave blank only if the cookie's mere presence already means "all categories accepted". - If the cookie is stored as a standalone browser cookie (visible in DevTools), set Is an External Cookie? to External. If the consent flag lives inside the PrestaShop cookie object instead, leave it disabled (Internal). Most third-party banners use external cookies; PrestaShop's native CMS-driven consent modules typically use internal ones.
- If your banner reloads the page after the visitor accepts, leave Page reloads after the consent? enabled (the default) — no selector is needed because the next page load picks up the new cookie automatically. If your banner activates without a reload, disable this option and enter a CSS selector for the consent dialog buttons in Selector for the Cookies Button. Use a selector that matches all the buttons on the banner (accept, reject, customise, save preferences) rather than just the accept button. That way any choice the visitor makes triggers Pixel Plus to re-check the consent state, keeping the module perfectly in sync with the banner — events fire the moment marketing consent is granted, and stay blocked otherwise.
- Click Save.
- Test in incognito: the pixel should not fire before consent and should fire (or resume after reload) once you accept.
localStorage-based consent
- Follow steps 1–4 above, but set GDPR Block Mode to Local Storage.
- In browser DevTools > Application > Local Storage, find the variable your consent platform writes.
- Enter the path to the consent value in Variable path to look for. Use
>>as a separator for nested objects — for example, if localStorage contains aconsentobject with amarketingproperty, enterconsent >> marketing. - Enter the exact value that signals acceptance (for example
true) in Expected Value/s. - Click Save and test as above.
Configuration fields reference
| Field | Values | Default | Description |
|---|---|---|---|
| Block the script? | Enabled / Disabled | Disabled | Master switch. When enabled, all browser pixel events are paused until the configured consent signal is detected. |
| GDPR Block Mode | Cookies / Local Storage | Cookies | Which mechanism your consent banner uses to record consent. If you are unsure, start with Cookies. |
| Add the cookie name to look for | Text | — | Exact name of the consent cookie (case-sensitive). Required when Block Mode is Cookies. |
| Specific Cookie Value? | Text | — | The fragment the cookie must contain to be treated as marketing consent given. Typically a JSON pair like "marketing":"true". Separate multiple accepted fragments with ` |
| Is an External Cookie? | Internal / External | Internal | Internal: the consent flag is inside the encrypted PrestaShop cookie object. External: the consent flag is a separate, plain browser cookie (most third-party banners). |
| Variable path to look for | Text | — | Path to the consent flag in localStorage, using >> for nested keys. Required when Block Mode is Local Storage. |
| Expected Value/s | Text | — | The value that signals consent has been granted (for example true). Required when Block Mode is Local Storage. |
| Page reloads after the consent? | Enabled / Disabled | Enabled | Enable if your consent banner reloads the page when the visitor accepts — Pixel Plus then picks up the new cookie automatically on the next load and no selector is needed. Disable if the banner activates without reloading, then provide the button selector below. |
| Selector for the Cookies Button | CSS selector | — | Only required when the page does not reload after consent. Ideally a CSS selector that matches every button in the consent dialog (accept, reject, customise, save preferences) — for example .consent-banner button. Matching all buttons lets Pixel Plus re-check the consent state on any visitor choice, keeping it perfectly synchronised with the banner. |
If you enable Block the script? but leave the cookie name (or localStorage path) blank, Pixel Plus will block all pixel events for every visitor. The Back Office will display a warning until you finish the configuration or disable the feature.
How It Works
On every page load, the module reads the configured consent signal from the visitor's browser:
- Cookie mode: The module checks whether the named cookie exists (via the PrestaShop cookie object for internal cookies, or directly from
$_COOKIEfor external ones). If a specific value was configured, the cookie content must contain that value. Multiple values separated by|||are checked one by one — a match on any of them grants consent. - localStorage mode: Because localStorage is not readable on the server, the module injects a small JavaScript snippet that reads the configured variable path and, if the expected value is found, calls back to your store to set a server-side session cookie (
fctp_localstorage_consent). On the next page load, the server reads that session cookie to determine consent.
When consent is detected, pixel events fire normally. When it is not detected, all browser-side pixel events are suppressed.
After the visitor accepts
Page reloads (standard flow): After the visitor clicks the consent banner's accept button, the page reloads. On the fresh load, the module finds the consent cookie and fires all events for that page normally.
No page reload: When Page reloads after the consent? is disabled, the module attaches a click listener to the CSS selector you specify. When that element is clicked, pixelConsent(true) is called: it calls fbq('consent', 'grant') immediately to activate the Facebook pixel in the visitor's browser session, and makes an AJAX call to update the server-side consent state so subsequent server-side checks are consistent.
The doNotConsentToPixel JavaScript variable
Setting window.doNotConsentToPixel = true in your own JavaScript will block all pixel events regardless of the cookie or localStorage state. This is useful for custom integrations — for example, if you manage consent through your own code and want direct control over when events fire.
Cookie inspector tool
The PrestaShop cookie object is encrypted in the visitor's browser — if you open DevTools, all you see is an opaque hash, so you cannot tell which keys and values it contains. To work around this, Pixel Plus includes a built-in inspector: a "click here" link next to the Is an External Cookie? field generates a short-lived security token and fetches the storefront cookie contents in a decrypted, readable format (excluding sensitive session fields like id_customer, passwd, session_token, etc.).
Use the inspector when your consent module writes its flag inside the internal PrestaShop cookie. The decrypted view shows you the exact key/value pair the module uses, which you then copy verbatim into Specific Cookie Value? (typically the JSON fragment that records marketing acceptance, e.g. "marketing":"true"). Without this tool, configuring an internal-cookie consent integration would require reading the module's source code or guessing.
For external cookies the tool is rarely needed — those are visible directly in DevTools > Application > Cookies.
Usage Examples
Example: Axeptio consent banner
Axeptio sets an external cookie named axeptio_cookies containing a JSON string with the accepted categories. Set Add the cookie name to look for to axeptio_cookies, set Is an External Cookie? to External, and enter "Facebook Pixel":true (or whatever fragment Axeptio writes when marketing tracking is accepted — open DevTools to confirm the exact spelling) in Specific Cookie Value?. Axeptio reloads the page after acceptance by default, so leave Page reloads after the consent? enabled.
Example: Custom banner without a page reload
Your designer built a custom consent overlay with Accept all, Reject all, and Customise buttons that update the consent cookie without triggering a page reload. Disable Page reloads after the consent? and set Selector for the Cookies Button to a selector that matches every button in the overlay — for example #consent-overlay button. Pixel Plus attaches a click listener to all of them and re-checks the consent state on each click. If the visitor accepts marketing, events fire immediately; if they reject or change their mind, the pixel stays paused — perfectly in sync with the banner.
Example: Internal cookie set by a PrestaShop consent module
Your store uses a PrestaShop consent module that writes the visitor's choice into the encrypted PrestaShop cookie object. You cannot see what's inside from DevTools. Click the click here link next to Is an External Cookie? to inspect the decrypted cookie contents in the Back Office. You spot a key like "consent_marketing":"1". Copy that fragment verbatim into Specific Cookie Value?, leave Is an External Cookie? set to Internal, and save.
Example: Multiple accepted values in one cookie
Your consent cookie can hold either "marketing":"true" or, for legacy visitors, "adv":"1". Enter "marketing":"true"|||"adv":"1" in Specific Cookie Value?. The module grants consent if any one of the fragments is present in the cookie value.
Example: localStorage with Didomi
Didomi stores consent in a didomi_token localStorage variable. Set GDPR Block Mode to Local Storage, Variable path to look for to didomi_token >> user >> status >> consent >> analytics >> enabled, and Expected Value/s to true. Pixel Plus reads this path on each page load and activates the pixel once the value resolves to true.
Consent applies to the Conversion API too
Both tracking channels are gated by the same consent state:
- Browser pixel — the pixel is initialised with
fbq('consent', 'revoke')and every event is held in a queue. Nothing is transmitted until consent is granted, at which point the queued events are flushed. - Conversion API — the server checks consent twice: once when the Conversion API object is created (the whole channel stays inactive, logged as
no_consent) and once again immediately before any payload is sent to Facebook. Without consent, no server-side request is made at all.
So the intended outcome is exactly what most merchants need:
| Visitor's choice | Browser pixel | Conversion API |
|---|---|---|
| Consent granted | Events sent | Events sent |
| Consent refused, or not yet given | Nothing sent | Nothing sent |
This only works if Pixel Plus can read the consent signal itself. The server has no way of knowing what a consent banner decided unless it is pointed at the cookie or localStorage entry that records the decision. Three configurations silently break the gate:
- The panel is off. If Block the script? is disabled, Pixel Plus treats every visitor as consenting. A third-party consent platform that blocks scripts on its own will stop the browser pixel, but the Conversion API keeps sending — it does not run in the browser, so an external blocker cannot reach it. If you see "pixel blocked, CAPI still firing", this is almost always the cause: enable this panel and point it at your platform's signal.
- A cookie name with no expected value. If Specific Cookie Value? is left empty, the mere presence of the cookie counts as consent. Many consent platforms write their cookie whatever the visitor chooses, so refusal would be read as acceptance. Always enter the value that only appears when advertising or marketing consent has been granted.
- A signal that only exists in JavaScript. If the decision lives solely in a JavaScript variable that is never written to a cookie or to localStorage, the server cannot see it. Use Local Storage mode (Pixel Plus writes its own
fctp_localstorage_consentcookie once the value is read), or configure your platform to write a cookie.
This applies to any consent platform, including IAB TCF ones such as Sirdata, Didomi or Axeptio: there is no TCF-specific integration, you bridge it by pointing this panel at a cookie or localStorage value that reflects the marketing/advertising purpose.
Important Notes
- Consent is re-evaluated on every page load. The module reads the consent signal from your banner on each request; the visitor's answer is also cached in a
pp_consentcookie so the server does not have to re-parse it on every page. When consent is withdrawn, the module clears that cache and deletes the temporary tracking cookies it had set. If the banner's own consent cookie expires, the next page load blocks both channels again. - Configuration is per-shop. In multi-shop setups, each shop can have its own consent cookie name, mode, and related fields. There is no global override for the GDPR settings.
- Misconfigured blocking blocks everyone. If Block the script? is on but the cookie name (or localStorage path) is empty, every visitor is blocked. The Back Office shows a warning — resolve it before the site goes live.
- Multiple pixel IDs. If you run multiple pixel IDs (via the multi-pixel feature), the consent state applies to all of them equally. You cannot consent to one pixel while blocking another through this panel.
- External cookie lookup. When Is an External Cookie? is enabled, the module reads from the raw browser
$_COOKIEsuperglobal. The value comparison is URL-decoded — both the raw value and its URL-encoded form are checked to handle banners that encode special characters.
Troubleshooting
| Problem | Solution |
|---|---|
| Browser pixel is blocked, but Conversion API events still reach Facebook | Your consent platform is blocking the pixel on its own while Pixel Plus's panel is disabled — the server never learns of the refusal. Enable Block the script? and point the panel at the cookie or localStorage value your platform writes. If the panel is already enabled, check that Specific Cookie Value? is filled in: a cookie name alone matches even when the visitor refused. |
| Pixel fires before consent is given | Confirm Block the script? is saved as enabled. Check the cookie name is exact — copy-paste from DevTools (Application > Cookies). Cookie names are case-sensitive. |
| Pixel never fires after accepting | Use the cookie inspector link in the GDPR panel to print all active storefront cookies. Verify the name and value match exactly what you have entered. Also confirm whether the cookie is internal (PrestaShop) or external. |
| All visitors are blocked after enabling | The Cookie name field is blank or incorrect. The Back Office warning confirms this. Temporarily disable Block the script?, fix the cookie name, then re-enable. |
| Pixel fires on acceptance but not on the next page | The consent cookie expires before the visitor navigates to the next page. Check the cookie's expiry in DevTools > Application > Cookies. This is a consent banner configuration issue, not a Pixel Plus issue. |
| localStorage mode works on the first page but not on subsequent ones | The fctp_localstorage_consent session cookie that Pixel Plus sets may be expiring with the browser session. This is expected — localStorage consent is re-validated on each new browser session. |
| No-reload mode: pixel doesn't activate after clicking accept | Verify your CSS selector targets the correct element. Open DevTools and run document.querySelector('.your-selector') in the console to confirm it finds the button. |
Does configuring this panel make my store fully GDPR-compliant?
The module provides the technical mechanism to block the pixel until consent is detected. Full GDPR compliance also depends on your consent banner's design, how consent is recorded and renewed, and your privacy policy. Consult your legal counsel for a complete compliance review.
Why shouldn't I just use a third-party module that blocks Pixel Plus entirely?
External blockers that remove Pixel Plus script tags from the page can interfere with Back Office features, and they cannot stop the Conversion API at all — it fires from your server, where browser-side blocking has no reach. Worse, because the module never learns that the visitor refused, server-side events keep going out. The built-in consent integration pauses the browser event queue and gates the Conversion API from the same signal, making it both more reliable and legally safer.
Does blocking the browser pixel also block the Conversion API?
Yes, provided this panel is configured. Both channels read the same consent state, and the server checks it twice before sending anything — once when the Conversion API is initialised and once immediately before each request to Facebook. If you observe the browser pixel being blocked while server events keep arriving, the panel is either disabled (your consent platform is blocking the pixel on its own) or configured with a cookie name but no expected value.
What does the doNotConsentToPixel JavaScript variable do exactly?
Setting window.doNotConsentToPixel = true in your own JavaScript suppresses all browser pixel events, regardless of the cookie or localStorage state configured in the Back Office. It is an escape hatch for custom integrations where you need to manage consent logic outside of Pixel Plus.
What is the cookie inspector tool and when should I use it?
When Is an External Cookie? is enabled, a link appears next to the field that generates a short-lived security token and prints your storefront's active cookies directly in the Back Office (excluding sensitive session fields). Use it when you do not know the exact name or value of the cookie your consent banner sets — it saves you from switching between the Back Office and DevTools.
Can I require multiple cookie values — for example, consent to both analytics and marketing?
The ||| separator in Specific Cookie Value? matches any of the listed values, not all of them. For an AND condition (all values must be present), you would need to use a single combined value that your consent banner writes, or handle the logic through the doNotConsentToPixel JavaScript variable in your theme.
My consent banner supports the IAB TCF standard (Sirdata, Didomi, Axeptio…). Does Pixel Plus integrate with that?
Pixel Plus does not have a built-in TCF integration and does not parse the TC string. You bridge it by configuring your TCF-compatible banner to write a standard cookie or localStorage variable when advertising consent is granted, then pointing Pixel Plus at that signal. Be careful to enter the value that marks consent, not just the cookie name: TCF banners usually write their cookie whether the visitor accepts or refuses, so a name-only check would read a refusal as an acceptance.