Pixel Setup
Available since v1.0
Connect your PrestaShop store to Facebook/Meta so that every visitor action — page views, product views, add-to-cart, purchases — is tracked and available for ad targeting and reporting in Meta Ads Manager.
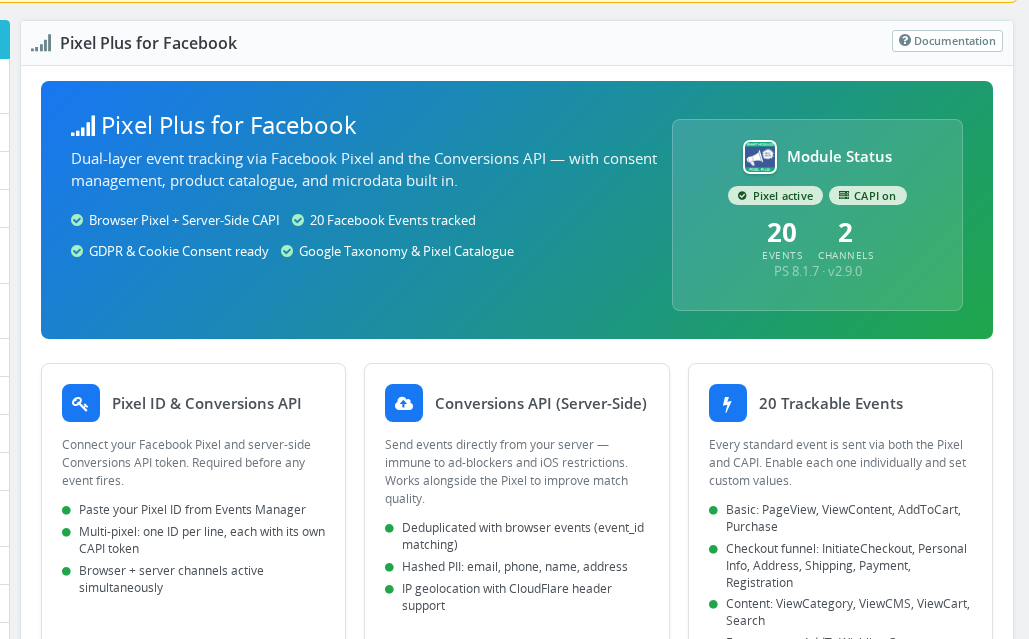
Overview
Your Facebook Pixel ID is the foundation of the entire module. Without at least one Pixel ID saved here, no events reach Meta — not browser events, not server-side Conversion API events, nothing.
The Pixel ID is the numeric identifier you get from Meta when you create a pixel in Events Manager. Once you paste it into the module and save, your store begins sending visitor data to Meta automatically. Most stores use a single pixel. If you run multiple Meta ad accounts or manage multiple brands, you can add several Pixel IDs separated by commas — the module then tracks all of them simultaneously and creates a matching Conversion API token field for each one.
Beyond the Pixel ID itself, this section has settings that control how the pixel behaves: whether events are scoped exclusively to your configured pixel IDs, whether event details are logged to the browser console for debugging, whether tracking parameters are stripped from URLs before the pixel reads them, and whether the pixel script loads immediately or after a configurable delay. An automatic bot filter prevents crawlers and search engines from inflating your event counts.
Configuration
- Go to Modules > Module Manager, find Pixel Plus for Facebook, and click Configure.
- Locate the Facebook Pixel's ID panel at the top of the page.
- Open Meta Events Manager in a separate tab, go to Data Sources, and copy your Pixel ID (a 15–16 digit number).
- Paste the ID into the Pixel Identifier field.
- For multiple pixels, separate each ID with a comma — for example:
1234567890123,9876543210987. - Click Save.
- Open your storefront in a browser with the Facebook Pixel Helper extension installed and confirm the pixel fires on page load.
Pixel ID panel fields
| Field | Values | Default | Description |
|---|---|---|---|
| Pixel Identifier | One or more Pixel IDs, comma-separated | — | Your Facebook/Meta Pixel ID(s). Required for any tracking to work. |
| Individualize Events | Enabled / Disabled | Disabled | Scopes every pixel event call to your specific pixel IDs only. Enable if another plugin is also loading a Meta pixel on the same store. |
| Log Pixels Behavior | Enabled / Disabled | Disabled | Prints pixel event details to the browser developer console. Use during debugging only — disable before going live. |
| Force clean URL parameters for Pixel events | Enabled / Disabled | Disabled | Strips sensitive URL parameters before the pixel script initialises. Conversion API events already receive filtered URLs automatically. |
Leave Pixel Identifier blank only if you want to temporarily disable all tracking. The module will not show an error, but no data will reach Meta.
The recommended approach for URL parameter issues is to configure parameter removal directly in Meta Events Manager under Diagnostics. The module's clean URL option is an additional client-side layer that works before the
fbqobject is initialised.
Deferred loading fields
These fields are found in the Advanced Options panel, under the loading section.
| Field | Values | Default | Description |
|---|---|---|---|
| Deferred loading | Enabled / Disabled | Disabled | Load the pixel script only after the page has fully loaded. Improves perceived page speed and SEO. |
| Deferred seconds | Integer (seconds) | 0 | How many seconds after page load to wait before loading the pixel. A value of 2–3 seconds is recommended. |
| Defer only the first time | Enabled / Disabled | Enabled | Apply the delay only on a visitor's first page load. Meta's pixel script is cached by the browser after the first download, so subsequent pages load it instantly from cache. |
How It Works
When a visitor loads any page in your store, the module injects the Meta Pixel JavaScript (fbevents.js) into the page. This script sends a PageView event to Meta and stays active in the visitor's browser so it can fire additional events as the visitor browses — viewing products, adding items to the cart, starting checkout, and completing a purchase.
The module checks every request against a list of known bot and crawler user-agent keywords before outputting any pixel code. If the visitor is identified as a bot — including Googlebot, Bingbot, AhrefsBot, and AI crawlers like GPTBot and ClaudeBot — the pixel is silently skipped. Visitors with no user-agent at all are also treated as bots. This keeps your event data clean and prevents crawlers from appearing in your Meta attribution reports.
Single pixel
You enter one Pixel ID and save. Every page on every storefront in that shop context fires events to that pixel. The Conversion API token field for that pixel appears in the same configure page, directly below the Pixel ID panel.
Multiple pixels
When you enter comma-separated IDs, the module creates a separate Conversion API token entry for each one. Events are sent to all configured pixels simultaneously — both via the browser pixel and via the Conversion API. Meta does not officially recommend running multiple pixels on the same site, but the module supports it fully when you need to split data across separate ad accounts.
Individualize Events matters when two different Meta pixels share the same page. Without it, calling fbq('track', 'ViewContent') signals every pixel loaded on the page — including any from other modules or tag managers. Enabling Individualize Events uses fbq('trackSingle', pixel_id, ...) for each call, so events are attributed only to your configured pixel IDs.
Deferred loading
When Deferred loading is enabled, the fbevents.js script is not injected immediately. Instead, JavaScript on the page waits until the DOM is fully loaded and then waits the additional number of seconds you configure before fetching the pixel. This prevents the pixel from competing with above-the-fold resources during initial page render.
Because browsers cache fbevents.js after the first download, the Defer only the first time option is enabled by default. It sets a session cookie (pp_deferred_loading_once) so that on subsequent pages the defer logic is bypassed and the cached pixel loads immediately.
Usage Examples
Example: Basic single-pixel store You run one PrestaShop shop with one Meta ad account. Paste your single Pixel ID and save. No other options need changing. The pixel fires on every page immediately and bot traffic is filtered automatically.
Example: Store with two brands sharing one checkout You operate two storefronts in multi-shop mode, each with its own Meta ad account and pixel. In each shop's module configuration, enter the corresponding Pixel ID. Enable Individualize Events so brand A's pixel only receives brand A's events and vice versa. Enter the matching Conversion API token for each pixel in its dedicated token field.
Example: Improving Core Web Vitals on a content-heavy homepage
Your homepage loads several large images and a product carousel. The pixel firing immediately competes with those resources. Enable Deferred loading, set Deferred seconds to 3, and leave Defer only the first time enabled. Visitors see a faster first paint, and subsequent browsing is unaffected because the pixel script is already cached.
Example: Debugging a new pixel installation
You have just installed the module on a staging store. Enable Log Pixels Behavior, load a product page, open the browser developer console, and look for fbq call entries to confirm the pixel initialises. Once confirmed, disable logging before making the store live.
Important Notes
- Each shop in a multi-shop setup has its own Pixel ID configuration — the Pixel Identifier field is per-shop (
global: 0). - When you add multiple Pixel IDs with commas, a separate Conversion API token field appears for each one. If you leave a token field empty for a given pixel, server-side events will not be sent for that pixel.
- Individualize Events has no practical effect when only one pixel ID is configured — the result is identical because there is only one target.
- Force clean URL parameters only affects the client-side pixel. If your pixel script is loaded by an external tag manager rather than the module, the cleaned URL cannot be applied.
- Force clean URL parameters should be used with caution and tested to confirm your shop's normal navigation is not affected.
- Bot detection uses a keyword match on the HTTP user-agent and caches the result in the visitor's session cookie to avoid checking on every page request.
- The deferred loading cookie (
pp_deferred_loading_once) lasts one week. If you want all page loads to use the defer delay during a test, clear your browser cookies first.
Troubleshooting
| Problem | Solution |
|---|---|
| Facebook Pixel Helper shows "No pixel found" | Verify the Pixel ID is saved correctly — no spaces, no trailing commas. Clear the PrestaShop cache and reload the storefront. |
| Meta Diagnostics warns about extra URL parameters | Enable Force clean URL parameters and save. If the warning persists, configure parameter removal directly in Meta Events Manager under the Diagnostics tab. |
| Events appear in Meta for a pixel you do not own | Enable Individualize Events — another plugin is sharing the Meta pixel library and broadcasting events to all loaded pixels simultaneously. |
| Pixel fires but data quality issues show in Meta | Check that each Pixel ID has a matching Conversion API token. Deduplication between browser and server events requires both to be configured for the same pixel. |
| No events showing after enabling deferred loading | Check that your theme's page has a DOMContentLoaded event. Very old themes built on PS 1.5-era JavaScript may not emit this event reliably. Try reducing Deferred seconds to 1 or disabling deferral. |
| Bot traffic appearing in Meta reports | This is likely from an ad verification crawler or monitoring service with a custom user-agent not on the built-in keyword list. Check your Meta Events Manager for the user_agent value in affected events and check whether it matches any known tool. |
Frequently Asked Questions
Where do I find my Pixel ID?
In Meta Events Manager, click Data Sources in the left menu. Your pixel appears in the list with its numeric ID shown underneath the pixel name.
Can I use the same Pixel ID for multiple shops?
Yes. You can enter the same ID in every shop's module configuration. All events will be attributed to the same pixel in Meta. This is common when multiple storefronts feed a single Meta ad account.
What happens if I leave the Pixel ID empty?
No events are sent at all — browser pixel events and Conversion API events both require a Pixel ID. The module runs without errors but silently skips all tracking.
Do I need to add the pixel code to my theme as well?
No. The module handles all pixel injection automatically. Adding the pixel manually to your theme would create duplicate events in Meta, which inflates your data and can affect campaign optimisation.
Does deferred loading affect Conversion API events?
No. Conversion API events are sent server-side and are not affected by any of the deferred loading settings. Only the browser pixel script delivery is delayed.
Will bots I send paid traffic to (like Facebook's own crawlers) trigger events?
The module filters known Meta crawlers — facebookexternalhit and meta-externalagent — along with dozens of other known bots. These identifiers are matched against the HTTP user-agent before the pixel code is rendered, so no pixel code reaches the page response for those requests.
Why does 'Defer only the first time' default to enabled?
Meta's fbevents.js is cached by the browser after the first download. On every subsequent page visit, the browser loads the pixel from its local cache rather than the network, so delaying it gains nothing. Deferring only the first load gives you the page-speed benefit where it matters without introducing unnecessary delays on cached loads.
Related Features
- Conversion API (CAPI) — Add server-side tracking on top of the browser pixel for better event coverage and reliability.
- Test Mode — Restrict pixel firing to your own IP address while configuring or testing.
- Trackable Events — Control which individual events (PageView, AddToCart, Purchase, and more) are enabled.